In this post I will demonstrate how to use Google OAuth in a ASPX webform with C#.
This project uses Visual Studio 2015 and as a option for the user to sign-up and other to check the sign-in.
Let's start by creating a new project.


And now the database. The users data will be recorded in a table of a SQL Server database.
First create the database.

Next enter the name and the database type.

Yes it's a new database.

That's it, and now add a new table.

The SQL script is this:

Click update and check for errors.

Let's check that the new table is in the database.

The data structure is done. Go to the Google Developer Console and select Credentials, on the left side.

After that Create a project.

Give it a name and click create.
Next select the type of credentials to be create, in this case it's OAuth Client ID.

In the next step you pick Web application e click configure consent screen, wish is the web page the user sees when he login's for the first time.

In the consent screen set the app name.

The redirect links must be set using the http port of your IIS express.

In the end we get the credentials to be used in our project (the secrets present were deleted).

The google account.

Do not forget the activate the Google+ API.


Back to Visual Studio add a Owin Startup class.

This class will be responsible for the configuration of the application, including the credentials we get from Google.

The sign-up page is the next step.

Set the name.


Now we have to add some NuGet packages, for that we need to open the console, so go to Tools -> NuGet Package Manager -> Package Manager Console.
In the new window insert the following lines:
install-package microsoft.owin.security.cookies
install-package microsoft.owin.host.systemweb
install-package microsoft.owin.security.google
The button that will start the sign-up process has this code.
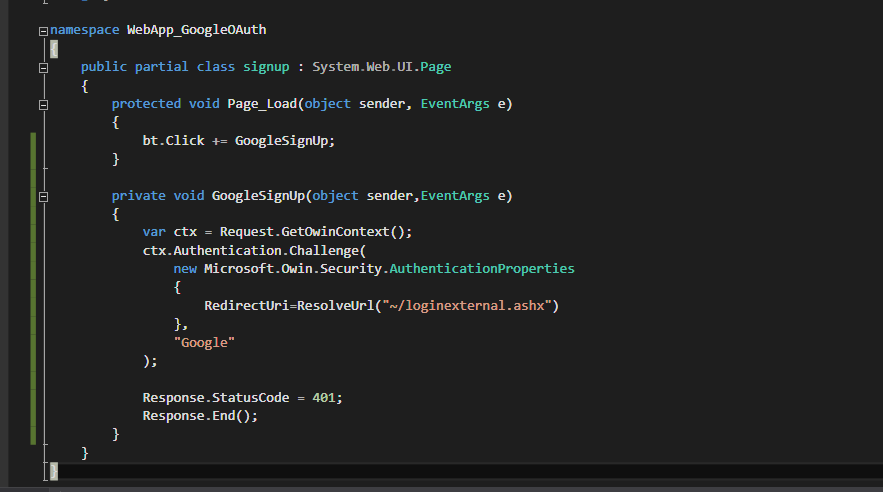
This code will open the Google login page and redirect the user to a handler.
But first let's create a connection string so we can use the database.
In the web.config insert the tags.
<connectionStrings>
<add name="sql" connectionString="Data Source=(LocalDB)\MSSQLLocalDB;AttachDbFilename=googleoauth.mdf;Integrated Security=True;Connect Timeout=30"/>
</connectionStrings>
To interact with the database base we will use a separated class with the name bd.
The construct of the class will establish the connect and the destruct will close it.
Some generic functions will make it easy to select and insert data from the database.
public DataTable devolveconsulta(string sql)
{
SqlCommand comando = new SqlCommand(sql, ligacaoBD);
DataTable registos = new DataTable();
SqlDataReader dados = comando.ExecuteReader();
registos.Load(dados);
comando.Dispose();
return registos;
}
public DataTable devolveconsulta(string sql, List<SqlParameter> parametros)
{
SqlCommand comando = new SqlCommand(sql, ligacaoBD);
comando.Parameters.AddRange(parametros.ToArray());
DataTable registos = new DataTable();
SqlDataReader dados = comando.ExecuteReader();
registos.Load(dados);
comando.Dispose();
return registos;
}
public bool executacomando(string sql)
{
try
{
SqlCommand comando = new SqlCommand(sql, ligacaoBD);
comando.ExecuteNonQuery();
comando.Dispose();
}
catch (Exception erro)
{
Console.Write(erro.Message);
return false;
}
return true;
}
public bool executacomando(string sql, List<SqlParameter> parametros)
{
try
{
SqlCommand comando = new SqlCommand(sql, ligacaoBD);
comando.Parameters.AddRange(parametros.ToArray());
comando.ExecuteNonQuery();
comando.Dispose();
}
catch (Exception erro)
{
Console.Write(erro.Message);
return false;
}
return true;
}
The handler that get's called after the user login to Google is create like this.

With this code.

Now the page that add's the user to the database, after the login to his Google account.

With the sign-up page working we can make the sign-in page like this:

And with this code:

And the handler:

And finally the page that checks the user information with the data in the database:

The project is available on GitHub.
Comentários
Enviar um comentário